
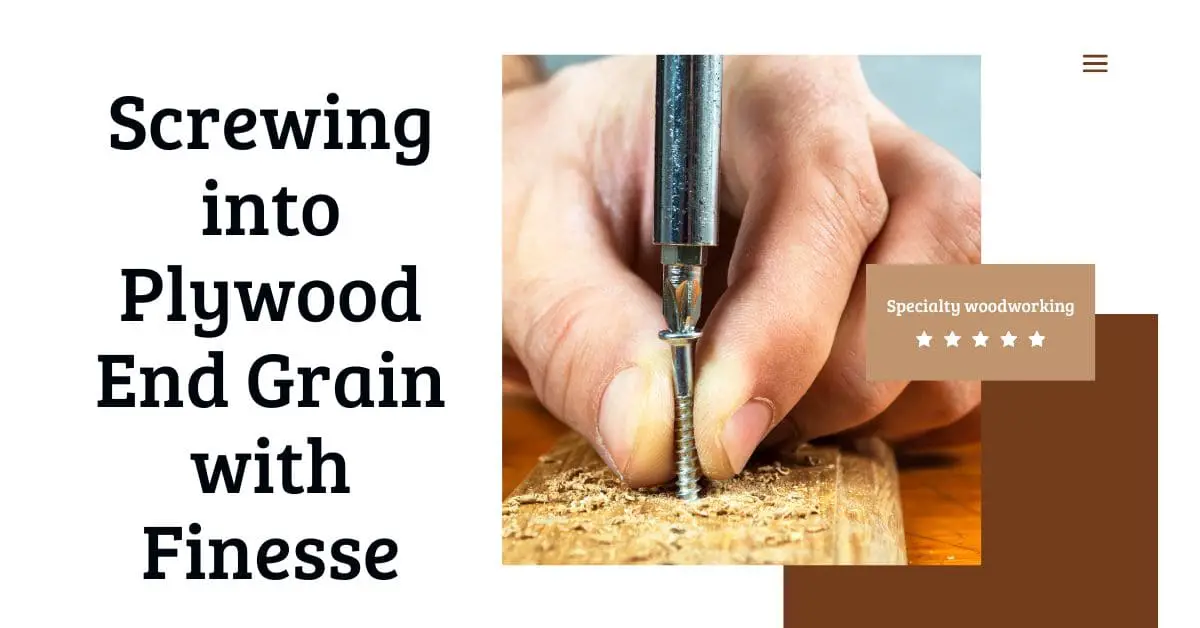
Ah, the world of woodworking—the realm where creativity meets craftsmanship, and every project presents a unique challenge. Today, we embark on a journey that tackles a specific task that often perplexes woodworkers: screwing into plywood end grain.
As an expert in the field of tools and woodworking, I am delighted to guide you through this intricate process, sharing insights, tips, and human touches that will elevate your woodworking game. So, grab your favorite screwdriver, let your imagination run wild, and let’s delve into the art of screwing into plywood end grain with finesse.
Understanding the End Grain Challenge:
Before we dive into the specifics, let’s explore why screwing into plywood end grain can be a bit tricky. Plywood, constructed from multiple layers of thin wood glued together, presents a unique composition that requires special consideration.
The end grain, where the layers are exposed, tends to be more porous and prone to splitting. Additionally, plywood’s layered structure may not offer the same solid base as solid wood. But fret not! With the right techniques and a touch of finesse, you can master this woodworking challenge.
Preparation is Key:
To achieve success when screwing into plywood end grain, proper preparation is essential. Here are some crucial steps to take before diving into the task:
1. Choose the Right Screw:
Opt for screws designed specifically for plywood applications. These screws often have special features like sharp points, self-drilling capabilities, and wide threads that provide excellent grip and reduce the risk of splitting.
Consider factors such as length, diameter, and type (flathead, Phillips, etc.) to ensure a secure and reliable connection.
2. Pre-drilling and Countersinking:
Pre-drilling pilot holes is crucial when working with plywood end grain. Use a drill bit slightly smaller than the screw’s diameter to create pilot holes, preventing the wood from splitting.
Additionally, countersinking the holes will allow the screw heads to sit flush with the plywood surface, providing a seamless finish.
3. Assess Screw Placement:
Carefully consider the placement of screws on the plywood end grain. Avoid positioning screws too close to the edge, as this increases the risk of splitting. Aim for a distance that provides ample material for the screw to hold securely without compromising the integrity of the plywood.
Screwing Technique and Human Touches
Now that we have prepared the groundwork let’s move on to the actual screwing process. Here are some techniques and human touches that will make a difference:
1. Gentle Pressure and Gradual Engagement:
When driving the screw into the plywood end grain, apply gentle, steady pressure to avoid excessive force. Gradually engage the screw, allowing it to grip the wood and create a secure connection. Rushing this process can lead to splitting or a weaker hold.
2. Feel the Resistance:
Developing a keen sense of touch is invaluable when screwing into plywood end grain. As you drive the screw, pay attention to the resistance you encounter. By feeling the wood’s response, you can gauge when to adjust pressure, preventing over-tightening or potential damage to the plywood.
3. Listen to the Sound:
Yes, woodworking can be a symphony! As you drive the screw, listen attentively to the sound it produces. A consistent, rhythmic sound indicates smooth progress. If you hear any unusual sounds, such as cracking or splintering, it’s a sign to halt and reassess your approach to prevent damage.
4. Finishing Touches:
Once the screw is securely in place, take a moment to appreciate your handiwork. Use sandpaper or a file to smooth any rough edges or imperfections. A touch of sanding sealer or wood finish can enhance the aesthetics and provide additional protection.
How to screw insert into plywood perfectly
When it comes to inserting screws into plywood perfectly, there are some key steps to follow. Let’s dive right in:
1. Choose the Right Insert:
To achieve a perfect screw insert, it’s crucial to select the appropriate insert for your plywood. There are various types of inserts available, such as threaded inserts, metal inserts, or wood inserts.
Choose one that is specifically designed for plywood applications and provides strong anchoring capabilities. T
hese inserts typically have sharp, self-tapping threads that grip the wood securely. Consider factors such as size, shape, and material to ensure a proper fit and a strong connection.
2. Mark the Insert Location:
Before inserting the screw, it’s essential to mark the precise spot on the plywood where you want to place the insert.
Take into account factors such as the thickness of the plywood, the desired depth of the insert, and the weight or load the insert will need to support. Use a pencil or a marking tool to clearly indicate the insertion point.
3. Pre-drill a Pilot Hole:
Once you’ve marked the insert location, it’s time to pre-drill a pilot hole. This step helps guide the insert into the plywood and prevents splitting.
Use a drill bit that is slightly smaller than the outer diameter of the insert. The pilot hole should be deep enough to accommodate the length of the insert without penetrating through the other side of the plywood. Ensure the pilot hole is straight and aligned with the marked spot.
4. Screw in the Insert:
With the pilot hole prepared, it’s time to screw in the insert. Align the insert with the pilot hole and begin screwing it in. Use a screwdriver or a drill with a compatible bit to turn the insert clockwise.
Apply gentle and consistent pressure to ensure smooth insertion. Take care not to overtighten, as this could cause the insert to strip or damage the plywood. Stop turning the insert once it is flush with the surface of the plywood.
5. Check for Flush Alignment:
Once the insert is inserted, check that it sits flush with the surface of the plywood. If necessary, use a wrench or pliers to adjust the depth of the insert, ensuring it is level with the plywood’s surface.
A flush alignment ensures that the insert will not interfere with the surrounding materials and provides a clean, professional finish.
6. Test the Insert:
After inserting the screw, it’s important to test the stability of the insert. Give it a gentle tug or apply some pressure to ensure it is secure and properly anchored within the plywood.
It should hold firm without any wobbling or movement. If there is any instability, consider repositioning the insert or choosing a larger size for a more secure fit.
7. Repeat the Process:
If you need multiple screw inserts in the plywood, repeat the above steps for each insert. Take your time to ensure proper alignment, pre-drilling, and insertion for each one. Consistency in the process will result in a clean and uniform look.
By following these steps, you can achieve a perfect screw insert in plywood. Remember to choose the right insert, pre-drill a pilot hole, insert the screw carefully, and ensure it is flush and secure.
With practice, you’ll become adept at inserting screws into plywood flawlessly, allowing you to confidently tackle your woodworking projects.
How Well Do Screws Hold in Plywood?
As an expert in woodworking and the field of tools, I can confidently say that screws hold remarkably well in plywood when used correctly. Plywood, with its layered construction, offers a solid base for screw connections. The key is to consider factors such as plywood grade, screw diameter and length, pilot holes, and screw placement to maximize the holding power.
When working with plywood, it is crucial to choose the right screws designed specifically for plywood applications.
These screws often feature specialized designs such as sharp points, self-drilling capabilities, and wide threads, which ensure optimal grip and minimize the chances of stripping or pulling out.
Pilot holes are another crucial element in maximizing the holding power of screws in plywood. By pre-drilling pilot holes slightly smaller in diameter than the screw’s outer diameter, you can prevent splitting and make it easier for the screw to penetrate the plywood.
The placement of screws is also essential. Positioning screws closer to the edges or near the center of the plywood can provide better anchoring and holding power. It is important to ensure that the screws are long enough to penetrate deeply into the plywood layers without protruding excessively.
By following these expert tips, you can create strong and reliable connections when using screws in plywood. However, it’s always advisable to consider the specific requirements of your woodworking project and consult the manufacturer’s recommendations for the best screw and technique for the desired results.
How to Screw into Thin Plywood: Techniques for Success
Working with thin plywood requires precision and careful execution to ensure a secure and reliable connection without compromising the integrity of the material.
In this guide, I will walk you through the step-by-step techniques to screw into thin plywood successfully. Let’s delve into the details:
1. Choose the Right Screws:
Selecting the appropriate screws is crucial when working with thin plywood. Opt for screws that are specifically designed for thin plywood applications.
Look for screws with a smaller diameter and shorter length to match the thickness of the plywood.
Using screws that are too long can cause them to protrude through the other side of the plywood, compromising the finish and potentially damaging the surface.
2. Pre-drill Pilot Holes:
Pre-drilling pilot holes is essential to prevent the thin plywood from splitting when inserting screws.
Choose a drill bit that is slightly smaller in diameter than the outer diameter of the screw.
This allows the screw to grip the wood without causing damage. Carefully align the drill bit with the desired screw placement and drill straight into the plywood, ensuring the depth matches the length of the screw.
3. Countersink the Holes:
To create a flush surface, countersink the pilot holes. Use a countersink bit or a larger drill bit to widen the opening at the top of the pilot hole.
This allows the screw head to sit flush with the plywood surface, providing a clean and professional finish. Take care not to drill too deeply to avoid weakening the plywood.
4. Apply Gentle Pressure:
When driving the screws into thin plywood, it’s crucial to apply gentle and controlled pressure. Thin plywood is more delicate compared to thicker wood materials, and excessive force can cause the plywood to crack or splinter.
Use a screwdriver or a drill with a clutch mechanism to regulate the amount of torque applied. Proceed slowly and carefully to ensure a gradual and secure insertion of the screws.
5. Use Washers if Necessary:
In some cases, you may find that the screw heads sink slightly into the plywood surface, even after countersinking. To address this issue, consider using washers.
Placing a washer between the screw head and the plywood surface helps distribute the pressure and provides additional support. This prevents the screw heads from sinking too far into the plywood and ensures a flush finish.
6. Test the Connection:
After inserting the screws, it’s important to test the stability of the connection. Give the screws a gentle tug to ensure they are securely anchored in the plywood.
Check for any wobbling or movement. If you notice any instability, make any necessary adjustments by tightening the screws or reinforcing the area with additional screws or adhesive.
7. Consider Backing Support:
If the thin plywood is too delicate to support the screw threads alone, you may need to consider adding backing support. This can be done by attaching a thicker piece of wood behind the plywood or using brackets or metal plates to reinforce the area where the screws are inserted. The backing support provides additional strength and stability to ensure a secure connection.
By following these techniques, you can successfully screw into thin plywood without compromising its integrity. Remember to choose the right screws, pre-drill pilot holes, countersink the holes, apply gentle pressure, and test the connection for stability.
With patience, precision, and attention to detail, you can achieve secure and reliable screw connections in thin plywood, allowing you to confidently tackle your woodworking projects.
Best Way to Fasten Plywood Together
The best way to fasten plywood together depends on the specific requirements of your project and the intended use of the plywood. Here are some commonly used methods for fastening plywood together:
1. Screws:
Using screws is a versatile and effective method to fasten plywood together. Pre-drilling pilot holes and countersinking the screw heads are important steps to prevent splitting and achieve a flush finish.
Screws provide a strong and secure connection, and they can be easily removed if needed. Select screws that are appropriate for the thickness and type of plywood you are using, and consider the load and stress the joint will endure.
2. Nails:
Nailing plywood together is another popular method, especially for non-structural applications. Nails provide a quick and efficient way to join plywood, but they may not offer the same holding power as screws.
It’s important to choose the right size and type of nails for the thickness of the plywood. To enhance the strength of the joint, consider using construction adhesive in conjunction with nails.
3. Dowels:
Dowel joints involve drilling holes in the edges of the plywood panels and inserting dowels to connect them. This method provides excellent alignment and stability.
Dowels distribute the load evenly across the joint, creating a strong bond. It’s important to ensure precise drilling and accurate alignment for a successful dowel joint.
4. Biscuit Joints:
Biscuit joinery involves using an oval-shaped wooden biscuit and corresponding slots in the plywood to align and connect the panels. Biscuits expand when they come into contact with glue, creating a tight bond.
This method is commonly used for joining large plywood panels or creating flat surfaces. Biscuit joints require a special biscuit joiner tool to cut the slots accurately.
5. Pocket Screws:
Pocket screws offer a simple and effective way to fasten plywood together, particularly for joining pieces at right angles.
A pocket screw jig is used to drill angled holes into one piece of plywood, and then screws are inserted to join the pieces. This method provides strong connections and is commonly used in cabinet making and furniture construction.
6. Adhesives:
Using adhesives in conjunction with mechanical fasteners can significantly enhance the strength and stability of plywood joints. Wood glue, construction adhesive, or epoxy can be applied to the edges of the plywood before joining them together.
Adhesives create a bond that distributes stress evenly across the joint, making it stronger and more durable.
It’s important to consider the specific application and load-bearing requirements of your project when choosing the best method to fasten plywood together.
Each method has its advantages and considerations, and the choice depends on factors such as the intended use, appearance, convenience, and structural requirements of the project.
How Close to the Edge of Plywood Can You Drill
When drilling holes in plywood, it’s important to consider the distance from the edge to prevent splitting and ensure the structural integrity of the material.
While the specific guidelines may vary depending on the thickness and type of plywood, as well as the intended use, here are some general recommendations for drilling holes close to the edge of plywood:
1. Minimum Distance:
As a general rule of thumb, it is advisable to maintain a minimum distance of 1 inch (2.5 cm) from the edge of the plywood when drilling holes. This guideline helps to prevent splitting and ensures that the plywood maintains its structural integrity.
2. Plywood Thickness:
The thickness of the plywood is a key factor in determining the distance from the edge to drill holes. Thicker plywood typically requires a greater distance to maintain stability and reduce the risk of splitting.
As a general guideline, for plywood with a thickness of 1/2 inch (12 mm) or less, maintaining a distance of at least 1 inch (2.5 cm) from the edge is recommended. For thicker plywood, increasing the distance to 1.5 to 2 inches (3.8 to 5 cm) is advisable.
3. Pilot Holes:
Pre-drilling pilot holes is essential when drilling close to the edge of plywood. The pilot hole should have a smaller diameter than the screw or drill bit to guide the fastener and reduce the risk of splitting.
By pre-drilling pilot holes, you provide a clear path for the screw or drill bit, minimizing the stress on the plywood edge and preventing potential damage.
4. Consider Reinforcement:
If your project requires drilling holes closer to the edge of the plywood, or if the plywood is particularly thin or prone to splitting, consider reinforcing the area around the hole. Adding additional support, such as using glue, dowels, or brackets, can help distribute the stress and strengthen the plywood at the drilled hole location.
5. Test and Evaluate:
It’s always a good practice to test and evaluate the plywood’s response before proceeding with drilling holes close to the edge. By testing on a scrap piece of plywood or a less visible area, you can assess the potential for splitting or damage.
Adjust the distance from the edge or consider alternative fastening methods if necessary.
It’s important to note that these recommendations are general guidelines, and the specific requirements may vary based on the type and condition of the plywood, as well as the intended use and load-bearing requirements of the project.
Always refer to the manufacturer’s recommendations and exercise caution when drilling close to the edge of plywood to ensure the best results.
Conclusion:
Screwing into plywood end grain may seem like a daunting task, but with the right techniques and a touch of finesse, you can conquer this challenge like a true woodworking maestro. Remember the importance of preparation, the gentle touch required during screwing, and the invaluable human touches that elevate your craftsmanship.
As you embark on your next project, armed with these insights, let your passion for woodworking guide you to create masterful pieces that showcase your talent. Embrace the art of screwing into plywood end grain with finesse and revel in the satisfaction of a job well done.
FAQs
Can I screw directly into plywood end grain without any special considerations?
While it is possible to screw into plywood end grain, special considerations are necessary due to its unique properties. Plywood end grain is more porous and prone to splitting compared to face or edge grain.
By following specific techniques and using appropriate screws, you can achieve a secure and reliable connection without compromising the plywood’s integrity.
What type of screws should I use for screwing into plywood end grain?
It is important to select screws specifically designed for plywood applications. These screws often feature sharp points, self-drilling capabilities, and wide threads that provide excellent grip and minimize the risk of splitting.
Choose screws that are suitable for the thickness of the plywood and the intended load-bearing requirements of your project.
Should I pre-drill pilot holes when screwing into plywood end grain?
Yes, pre-drilling pilot holes is highly recommended when screwing into plywood end grain. The pilot holes should have a diameter slightly smaller than the screw’s outer diameter to prevent splitting and provide a clear path for the screw. Pre-drilling also helps ensure accurate screw placement and alignment.
How far should the screws be placed from the edge of plywood end grain?
To minimize the risk of splitting, it is advisable to place screws at least 1 inch (2.5 cm) away from the edge of plywood end grain. This distance provides sufficient material for the screw to grip securely without compromising the integrity of the plywood.
Are there specific techniques to prevent splitting when screwing into plywood end grain?
Yes, several techniques can help prevent splitting when screwing into plywood end grain. In addition to pre-drilling pilot holes, you can use screws with sharp points or self-drilling capabilities to reduce the force required for insertion. Applying gentle and controlled pressure while driving the screws helps minimize the risk of splitting as well.
What should I do if I encounter splitting while screwing into plywood end grain?
If splitting occurs, stop immediately and assess the situation. You may need to adjust your technique or use alternative fastening methods. To address minor splits, you can remove the screw, apply wood glue to the split area, and reinsert the screw. For more severe splitting, consider reinforcing the area with additional support, such as dowels or adhesive.
Can I use wood glue in conjunction with screws when screwing into plywood end grain?
Yes, using wood glue in conjunction with screws can enhance the strength and stability of the connection. Applying a thin layer of wood glue on the mating surfaces before screwing helps create a bond that distributes stress evenly across the joint. This can be particularly useful in load-bearing applications or when extra reinforcement is desired.
Are there specific screws or techniques for screwing into thin plywood end grain?
When working with thin plywood, it is crucial to use screws specifically designed for thin materials. These screws often have smaller diameters and shorter lengths to match the thickness of the plywood. The same principles of pre-drilling pilot holes and applying gentle pressure apply when screwing into thin plywood end grain.
Can I use different screw types for screwing into plywood end grain?
While specific screw types such as wood screws or construction screws are commonly used for plywood end grain, other screw types may also be suitable depending on the project’s requirements. It is important to consider the thread design, size, and material of the screw to ensure optimal grip and compatibility with the plywood end grain.
Are there any alternative methods to screws for fastening plywood end grain?
Yes, alternative methods such as dowels, biscuits, or specialty connectors can be used to fasten plywood end grain. These methods provide additional reinforcement and can be effective in certain applications. However, it is important to carefully consider the specific requirements of your project and choose the method that best suits your needs.